 |
|
||||||||||
|
|
|
||||||||||
|
Reading for Meaning
| Title | Reading for Meaning | |||
| Author | Tom Snyder Productions | |||
| Contact Information | Tom Snyder Productions 80 Coolidge Hill Road Watertown MA 02472-5003, USA. Phone: 1-800- 342-0236 FAX: 1-800-304-1254 Email: ask@tomsnyder.com Web site: http://www.tomsnyder.com | |||
| Product Type | Reading and Language Arts | |||
| Minimum System Requirements | Hardware | Machine Platform | PC | Mac |
| Operating System | Windows OS 98 / 98SE/ ME/ 2000/ XP home/ XP pro | Mac OS 8.1/ 8.6/ 9/ X.1 (native) | ||
| Chip | Windows 200 Mhz, Pentium I or higher | Mac 200 Mhz, Power PC | ||
| Minimum Display | 16 bit colors; 800x600 resolution | Thousands of colors; 800x600 resolution | ||
| RAM | 32 MB RAM | |||
| Hard Disk | 50 MB of hard drive space | |||
| Software | Browser | Internet Explorer 5.0 or higher (included on CD) Or Netscape Navigator 4.0 or higher | ||
| Flash Player | Version 5.0 or higher (included on CD) | |||
| Shockwave | Included on CD | |||
| Price | Number of computers | Price (all USD) | ||
| 1 | $99.00 | |||
| 5 | $300.00 | |||
| 10 | $600.00 | |||
| 30 | $900.00 | |||
| 50 | $1,050.00 | |||
| Unlimited Value Pack | $1,200.00 | |||
| Special Offer | Tom Snyder Productions offers a free one month trial of Reading for Meaning as an Internet subscription service. Sign-up for this service at http://reading.tomsnyder.com/readingformeaning/subscription/try.html | |||
Reading for Meaning is a software program for 3rd - 8th graders that can support developing reading comprehension skills. The program targets five reading comprehension skills used in standardized testing: the main idea, inference, sequence, cause & effect, and compare & contrast. It also includes teacher resources that can be used to store and monitor students' work. The program can be used for self-study, in small groups, or with an entire class. [-1-]
To install the program, insert the CD-ROM into the CD drive. For Macintosh computers: double-click the installer and follow the on-screen instructions. PC users choose 'Run' from the Start menu and then, type D:\SETUP (if 'D' is your CD-ROM drive) and follow the on-screen instructions. After installation, launch the program by double-clicking the Reading for Meaning icon that appears on the desktop.
The first time you use the program choose 'New Workspace' from the dialog box and name your Workspace file. If you wish to resume the program at a later time, you can re-launch it by double-clicking your Workspace file icon. Your Workspace file will save your lessons and graphic organizers.
After creating a Workplace file, a welcome screen will be shown; from this screen you can access either Class Activities or Teacher Resources.
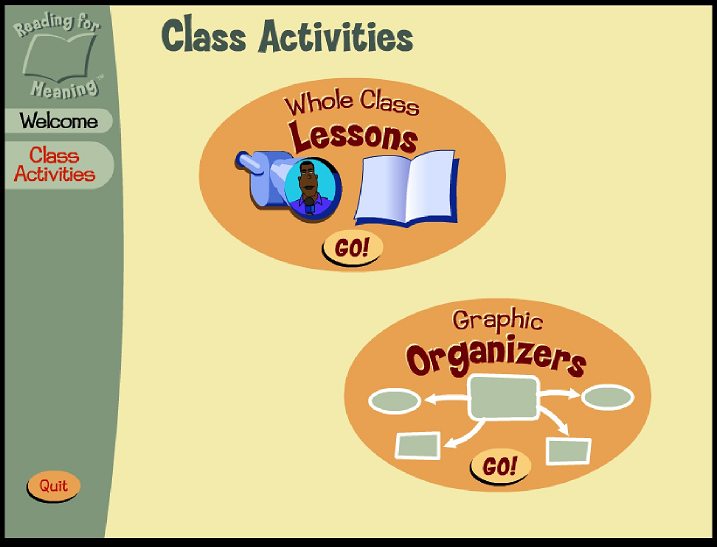
Class Activities consist of 'Whole Class Lessons' and 'Graphic Organizers' (Figure 1).
Whole Class Lessons each consist of five Lesson Topics that cover five reading comprehension skills: the main idea, inference, sequence, cause & effect, and compare & contrast (Figure 2). Each Lesson Topic includes one 'Modeling Lesson' and six 'Class Lessons (Literature Lessons)' (Figure 3).
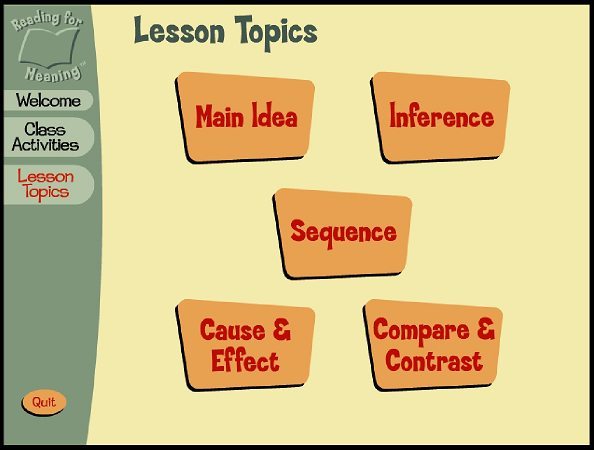 [Figure 2] Lesson Topics | 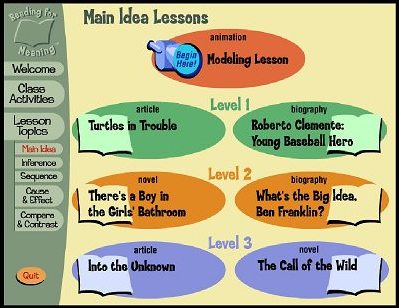 [Figure 3] Lesson Topic: the Main Idea |
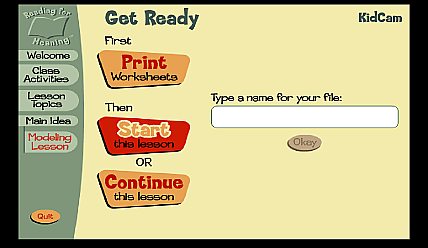
Modeling Lessons introduce students to the Lesson Topic, help students learn the lesson format, and prepare them for further lessons. Before class, teachers need to print out the student worksheets by clicking the 'print worksheet' icon (Figure 6). The worksheets provide students with four tasks - Watch, Think, Write, and Check - to follow during the lessons, and the lessons themselves are displayed using this four-step process. Each modeling lesson includes a one-page worksheet, examples of which are visible in Figures 4 and 5. [-2-]
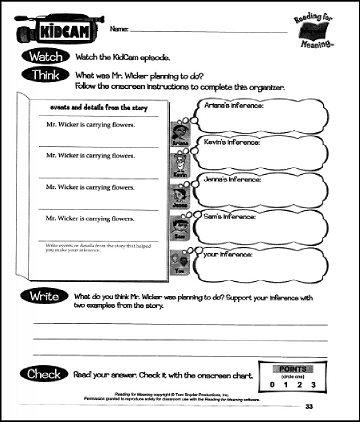 [Figure 4] Student worksheet, sample 1 | 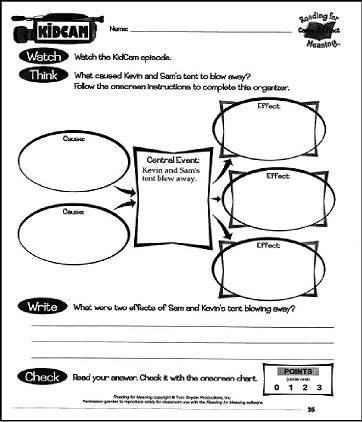 [Figure 5] Student worksheet, sample 2 |
Step 1: Watch
For the first step of the modeling lesson, students watch a short animation (3-4 minutes), named 'KidCam', that introduces one of the five reading comprehension skills (Figures 7 & 8). A narrator introduces the context of the story and appears two or three times during the movie by pointing out the reading comprehension skill which students need to learn from the lesson. Then, the narrator summarizes the story by using the skill focused on in the lesson. For example, the narrator summarizes the most important events in the animation for sequence lesson.
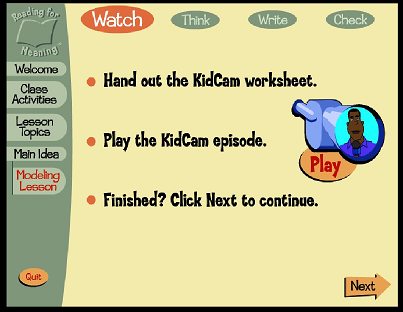 | 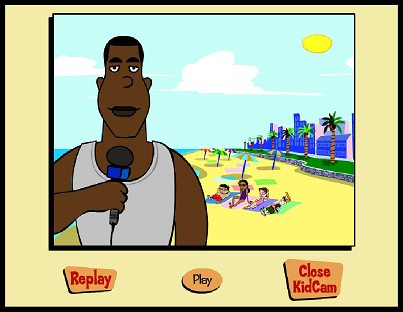 |
[Figure 7] Modeling lesson: the Main Idea—Preparing to 'Watch' | [Figure 8] Modeling lesson: The animation |
The animated movie is attractive in that it contains colorful visual clues and sound effects in addition to the narration. This helps students pay attention and prepare for the Class Lesson (Literature lesson).
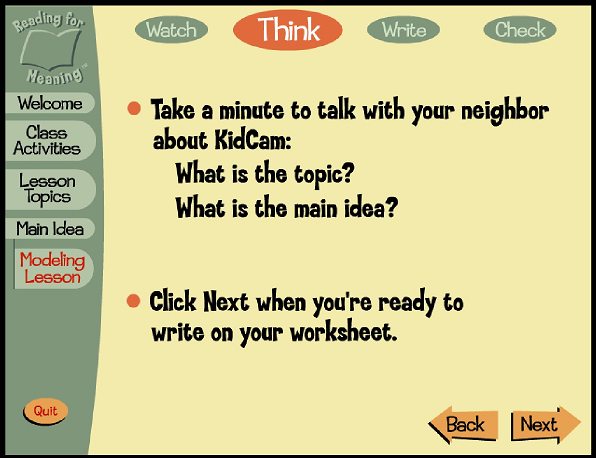
Step 2: Think
Next, students will have 'think' about questions related to the reading comprehension skill being modeled (Figure 9). The questions directly bring the central issue that students are learning through the lessons by guiding them to focus on specific reading comprehension skills. [-3-]
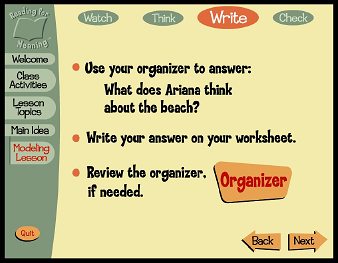
Step 3: Write
Then, students are asked to write their answers to the questions (Figure 10), and, a Graphic Organizer appears (Figure 11). Students can create and save their graphic organizers in their own Workspace file as individuals or small groups. In addition, teachers can create and save whole class organizers into the classroom workspace. The Graphic Organizers saved can be reviewed during the next, 'Check' step.
The program includes five types of Graphic Organizers, one designed for each Lesson Topic area. These different organizers allow teachers to effectively target specific skill areas. For example, the Graphic Organizer for the 'Compare & Contrast' skill provides effective graphics divided into three parts that prompt students to think of the differences and similarities found in their reading text (Figure 11).
 [Figure 10] Modeling Lesson: 'Write' | 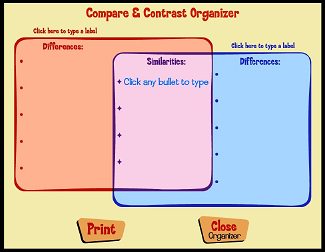 [Figure 11] Graphic Organizer |
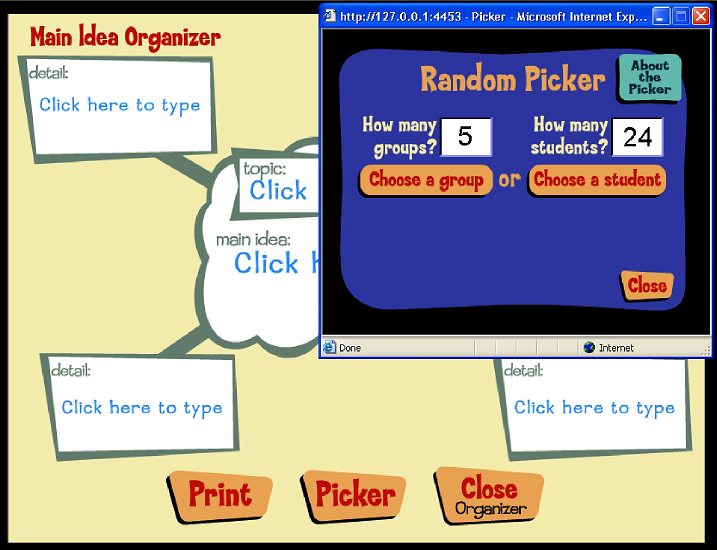
To complete the 'Write' activity, students can either work as individuals or in small groups to answer the open-ended questions included in their worksheets; writing must occur on the worksheets because the program does not provide onscreen workspace for writing. During the 'Write' step, students can review their graphic organizers to find information needed. Students then share and discuss their responses with the entire class. The 'Picker' (available for network users) allows teachers to call on individual students or groups to share their answers with classmates. This helps to create active classroom discussions by offering students oral language presentation experiences (Figure 12).
Step 4: Check
The last step of the modeling lesson is 'Check', and the on-screen instructions ask students to check and compare their answers to sample answers. In particular, the sample answers direct students to reflect upon and evaluate their answers focusing on three criteria: answering all parts of the question, using examples from the text, and following good writing rules such as using complete sentences, correct spelling, and good punctuation (Figures 13 & 14). The sample answers supplied are worth 1 point, therefore, teachers need to have students discuss and find what makes good answers that are worth 3 points (note the Point scales under 'Check' on the worksheets in Figures 4 and 5) so students can create better answers to the questions. [-4-]
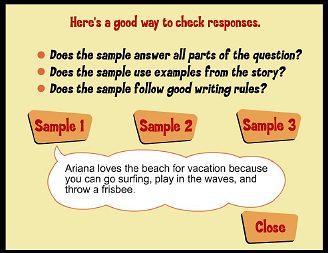 [Figure 13] Sample Answers | 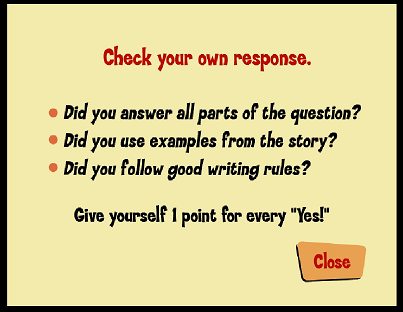 [Figure 14] Prompts for Self-evaluation |
To complete this 'Check' step, students must each have their own worksheet and follow the onscreen instructions. Then, they share their answers with classmates (face-to-face interaction), and evaluate their worksheet responses.
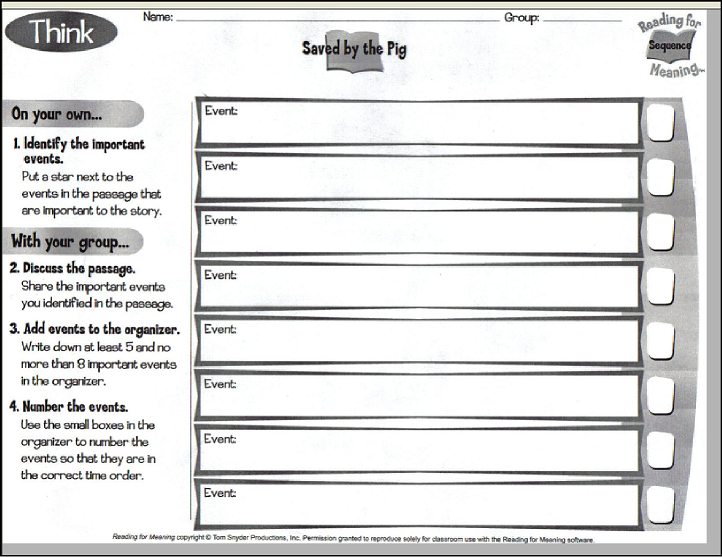
The Literature Lessons contain 30 lesson plans, each consisting of the aforementioned five reading comprehension skills. The pre-task instructions for the Literature Lessons are the same as those for the Modeling Lessons: 1) print out worksheets, 2) create a lesson file (or resume a lesson by clicking an existing file), and 3) start a lesson by following the onscreen instructions. The content format of the Literature Lessons is also the same as the Modeling Lessons, however Literature Lessons use reading text instead of an animation, so the first step in the process is 'Read' instead of 'Watch'. Three pages of student worksheets belong to each Literature Lesson: the first page includes the reading text, the second page includes a graphic organizer (Figure 16), and the third page includes writing questions and a self-evaluation checklist (Figure 17).
Step 1: Read
During the first step students read onscreen captions supported by audio narrations (Figure 15). This helps students to improve their reading fluency (Rasinski, 1990) by giving them opportunities to read and listen simultaneously. Students can reply or pause the reading while they are listening.

The texts of the Literature Lessons are excerpted from the literature of several famous authors (e.g., Brothers Grimm) and publishers (e.g., National Geographic WORLD magazine). Therefore, students can experience the authentic reading materials while learning the reading comprehension skills with the program. The Literature Lessons are divided into three different reading levels (Figure 3), each offering a variety of genres. Therefore, teachers can select lessons depending on their students' reading comprehension level. For example, "The Greedy Dog" (first level) can be used for young learners, while a poem with deeper meaning such as "The Road Not Taken" (third level) may be used for students who possess a higher level of reading comprehension skills. The length of readings varies depending upon the genre but they are shorter than 4 minutes and only one or two paragraphs appears on a screen. No sound effects (such as background music), other than the text narration, are provided in the Literature Lesson. [-5-]
Step 2: Think
To facilitate students' thinking, the Literature Lessons contain effective Graphic Organizers that help students review the text in mind, generate ideas, and develop each reading comprehension skill based on the readings. The Graphic Organizer shown below is for the lesson on the 'Sequence' reading comprehension skill.

Step 3: Write
Like the 'Write' step in the Modeling Lesson, students must have a copy of worksheets that include guided questions of what to write (Figure 17). To raise students' ideas, it is suggested there be a class discussion before they work as individuals or in small groups. Then, they are asked to share their answers with the entire class.
Step 4: Check
To check their answers, students use the same strategy practiced in the Modeling Lessons. Based on three samples answers provided on-screen (refer to Figure 13), students can compare their responses. The sample answers are not provided as a perfect answer key, rather they serve as models for students. Then, students will use the chart at the bottom of the 'Write and Check' worksheet to evaluate their own answers (Figure 17). [-6-]
As previously noted in the Modeling Lesson, Reading for Meaning provides five types of graphic organizers designed for five essential reading comprehension skills. In addition to the graphic organizers for the Modeling Lessons and Class Lessons, the program provides five Blank Graphic Organizers that can be used along with any other reading materials. Students can create and save their own organizers into their workspace file. Also, teachers can create and save a classroom organizer through the whole classroom discussion.
Reading for Meaning provides two teacher resources: The 'file manager' and the 'lesson plan library'.
The File Manager stores all lesson files and graphic organizer files. With the File Manager, teachers can see graphic organizers created by the whole class, small groups or individual students. Therefore, File Manager allows teachers to review and monitor students' work in progress.
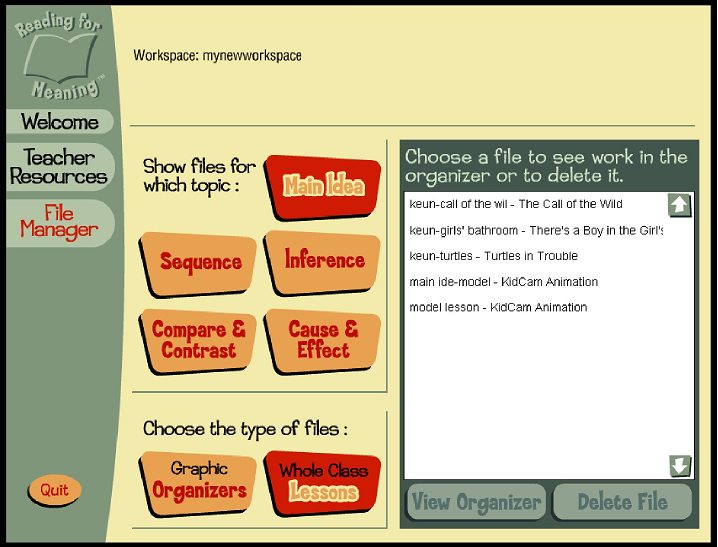
The Lesson Plan Library contains 30 lesson plans that include student worksheets and can be sorted by title, author, and topic (Figure 19). The worksheets for these additional lessons can only be viewed as hardcopy printouts and cannot be viewed onscreen; the program only provides the 'Lesson Plan Summary' onscreen (Figure 20). Each lesson plan worksheet consists of four pages: Lesson Plan Summary, Think, Write and Check, and an Answer Key. [-7-]
 [Figure 19] Lesson Plan Library | 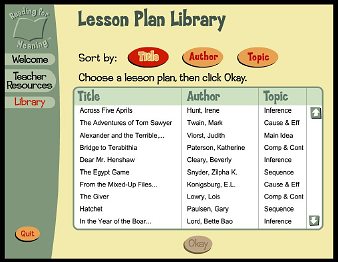 [Figure 20] Lesson Plan Summary |
By clicking the 'print' icon in a Lesson Plan summary screen, teachers can create the handout worksheets.
Research-based Approach
Reading for Meaning is developed based on many research evidences for reading instruction that show the effectiveness of: (1) teaching explicit reading instruction (Palinscar and Brown, 1984; Langer, 2000), (2) using semantic mapping systems such as Graphic Organizers (Merkley & Jeffries, 2001), and (3) indirect vocabulary teaching through reading and discussions (CIERA, 2001).
First of all, the program clearly demonstrates specific reading skills, strategies, and processes to students. Its explicit instruction, which corresponds to cognitive strategies, should enhance students' reading comprehension. The Modeling Lessons allow teachers to model each skill for the students, allowing them to eventually apply the skills to their own reading. In turn, all students, both native English speakers and English language learners (ELLs) can internalize essential reading comprehension skills. Also, the program effectively helps students organize and remember the most important text information by providing well-designed Graphic Organizers. Furthermore, the program helps students to learn vocabulary by providing indirect ways such as encouraging self-reading and discussion activities.
Multi-levels and Multi-literatures
Reading for Meaning covers a broad range of literature and various genres such as articles, folktales, myths, fairy tales, autobiographies, stories, and poetry. Furthermore, because the program consists of three different levels of literature, teachers can adapt the program for students with different needs.
Flexible Use
The program can be used in a variety of classroom or school settings. In a classroom, it can be used to teach whole classes, small groups, or individuals. If only one computer is available, the teacher can create one Workspace file for each class. Alternatively, if multiple computers are available, the teacher can lead a group of students or an individual through the process of creating their own Workspace file. With this flexibility, teachers may effectively enhance teaching and learning in reading lessons within their classroom and/or school context.
Teacher Resources
The two teaching tools noted earlier, File manager and Lesson Plan Library help teachers prepare and teach their lessons, increasing teaching effectiveness and convenience. In particular, the File Manager allows teachers to review and monitor students' work. The Lesson Plan Library helps teachers save time preparing their lessons by allowing them to focus on a specific reading skill and genre of literature according to their students' needs.
Print Restriction
The program does not allow users to review the worksheets onscreen; it is only possible to see them as hardcopy printouts. For example, students cannot directly write their answers on the computers during the Write step, rather they can only type on the screen when they work on Graphic Organizers. However, it would make the lessons more interactive if students could respond directly on the screen and share their writing responses via a network. This printing restriction may also make it difficult for teachers to plan their lessons in advance at any location without a printer. [-8-]
Text-only Literature
The program provides only plain text through all the Literature Lessons. This may diminish student motivation and offer less incentive for those who are easily distracted from the text. If the program provided support graphics, such as picture cues, in the reading text it would be beneficial to the student who needs more scaffolding in reading lessons. To overcome this weakness of the program teachers might need to consider providing a variety of cues (e.g., pictures, body language, gestures, and intonation) when they use the program.
Internet-Access Requirements: Limited Network Accessibility
The Reading for Meaning program offers a different network option depending on the number of computers using the program, for 30 or more computers. Therefore, if a school has 30 computers using the program, all the computers can be networked together. In this case, the school should be available to provide network space under the school server so that teachers and students can afford to store their Workspace files. This is one of advantages of the program. However, if schools do not have their own server, the program also cannot be fully used without networking.
On the other hand, smaller numbers of users (less than 30 computers) cannot be set up with the network connection. In this case, all users (teachers and students) are not able to share their workspace file in a common network station. Therefore, this feature of the program cannot be employed.
According to the publisher, the learning objectives of Reading for Meaning correlate to the IRA/ NCTE Standards for English Language Arts (http://www.ncte.org/print.asp?id=110846&node=204), including a range of literature genres, strategies, and frequent opportunities for students to talk and write. Because of this reason, it will be advantageous for both ELLs and native English speakers for developing reading comprehension skills required for school learning.
In addition, the many small group and classroom discussion opportunities offered by the program will create more interactive classroom environments facilitating collaborative talk (Carmen, 1998) among students (e.g., small group discussions). In particular, ELLs who need more language experiences in the classroom will benefit by the interactive and collaborative work opportunities while they are developing reading comprehension skills.
Even though the program provides many advantages for all students, however, the successful application of the software will depend on how teachers manage it. Because the effective literacy instruction is not simply a collection of strategies, the learning environment in which teachers create to facilitate ELLs' academic English language proficiency will also be a key factor for the most effective use of the program. Therefore, to create an optimal classroom learning environment and the most effective use of the program, teachers must devote their effort to choose reading materials that are the most appropriate for their students. Next, teachers need to adapt the strategies for their particular situation, if the learners differ in age or need. Finally, teachers need to give students plenty of opportunities to read independently and to practice the strategies employed by the program during the lesson.
Good teaching is teaching for all (Drucker, 2003, p. 22). However, again, teachers should keep in mind the fact that some strategies may be more important than others, depending on the specific circumstance.
Carmen, S. (1998). Classroom strategies for encouraging collaborative discussion. Directions in Language and Education, 12.
Center for the Improvement of Early Reading Achievement (CIERA). (2001). Put reading first: The research building blocks for teaching children to read. Washington, DC: National Institute for Literacy.
Drucker, M. J. (2003). What reading teachers should know about ESL learners. The Reading Teacher, 57 (1), 22-29.
Langer, J. (2000). Beating the odds: Teaching middle and high school students to read and write well. Albany, NY: National Research Center on English Learning & Achievement.
Merkley, D. M., & Jeffries, D. (2001). Guidelines for implementing a graphic organizer. The Reading Teacher, 54, 350-357.
Palinscar, A. S., & Brown, A. L. (1984). Reciprocal teaching of comprehension-fostering and comprehension-monitoring activities. Cognition and Instruction, 2, 117-175.
Rasinski, T. (1990). Effects of repeated reading and listening-while-reading on reading fluency. Journal of Educational Research, 83, 147-150.
Keun Huh is a doctoral candidate at Washington State University whose research interests are computer-assisted language learning and ESL. She developed online teacher training courses for English Language Learners (ELLs) under a Training of All Teachers (Toat) grant, and is currently developing online ESL courses for pre-service teachers.
Keun Huh mail.wsu.edu
|
© Copyright rests with authors. Please cite TESL-EJ appropriately. Editor's Note: Dashed numbers in square brackets indicate the end of each page for purposes of citation.. |
|
||||||||||
[-9-]